 |
        |
|
Alexander's Light Show
I have a '59 Thunderbird in
which I have installed blue dots. Blue dots are blue
pieces of glass a half inch in diameter in the shape of
a diamond with the tip cut off surrounded by a metal
ring that can be mounted in the red part of the
taillight. They were initially promoted as a safety
device in the 1920's. For the same intensity of light
blue can be seen farther than red, because our eyes are
more sensitive to blue. They were subsequently made
illegal, when states decided blue light should only be
used on emergency vehicles. Customizers continued to use
these until the 1960's on their cars, because blue dots
produce purple glow and streaks of blue light at night
that looks so cool . Now people put all kinds of
colored bulbs in their signal and taillight assemblies.
I wanted to customize my new Mark VIII in this fashion,
but do it in more high tech approach. The way I have the
car setup, I can turn on strobe lights in my grill and
rear turn signals at flick of a dash switch.
Additionally I can change the color of the back up light
by the switches I have installed on the dash, because
there are now two additional bulb assemblies in the back
up light assembly. I can have the taillights
continuously red all across at night, or I can have a
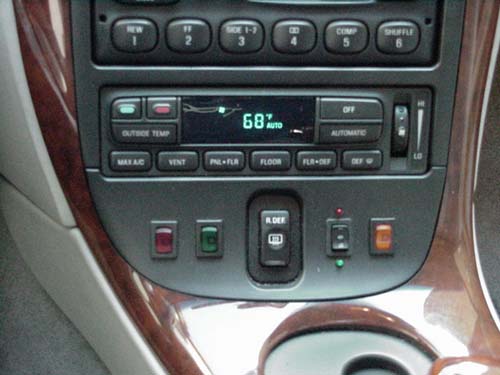
blue dot type of effect using the blue bulb. This is the switch panel that I have located on the dash beside the rear defroster switch:
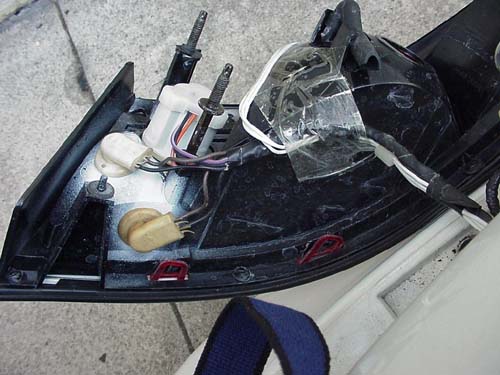
This is a picture of the rear of a modified left taillight assembly:
As you can see, there are two additional marker light sockets in the back up light assembly. One was used for a blue colored marker bulb, the other for a red colored marker bulb. Additionally, the single filament back up light socket has been replaced by a dual filament turn signal type socket. This gave me an extra filament that can be dash controlled for a white light, while leaving the back up light function unaffected. I use the additional white light as a warning when idiots tailgate me.
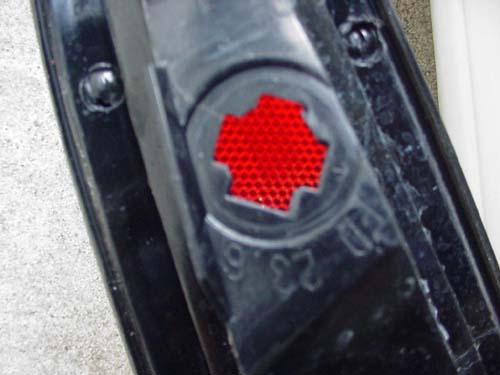
These are ordinary marker
light sockets that can be found in most late model Ford
cars going back to the eighties. You can get them
cheaply in auto salvage yards. To mount these you will
need to cut out asymmetrical cross-like holes in the
taillight assembly. Trace out the contour of the cut out
using the the hole found on the marker light of your
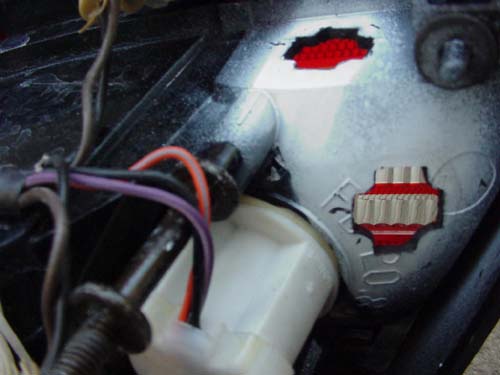
stock Mark VII assembly shown here:
I cut these silhouettes out of Post-it note paper, so I could again precisely determine where to make the holes, before doing any drilling. I used the same white paint method that I previously described. I wanted to get this right the first time, because these taillight cost $150 a piece from the dealer in 1998. Remember when placing these holes, that the socket rotates 45 degrees clockwise after insertion in the hole before locking in. The left and right taillight assemblies will be mirror images of where the holes are placed, but not how they are oriented rotationally. Hold the socket on the taillight in the orientation that you want it to be mounted, then rotate it counterclockwise 45 degrees. This is the orientation of the hole that you want to cut out.
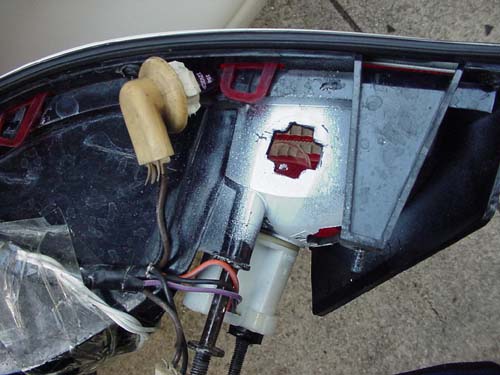
This is a picture of the left taillight with the holes cut out:
Another view of the left taillight assembly:
You can see the residual of the white paint I used to make the outline of the holes using my Post-it note system. Mounting the sockets in these positions will give you no interference problems; the bulbs do not touch, and the sockets clear the the opening for the taillight assembly. Make sure the holes you make are precise, so will have a waterproof seal. You don't want water in your expensive taillights. Make sure you get the flat type 90 degree type of marker socket pictured here. The straight type of socket will give you interference problems when reinstalling the taillight assembly.
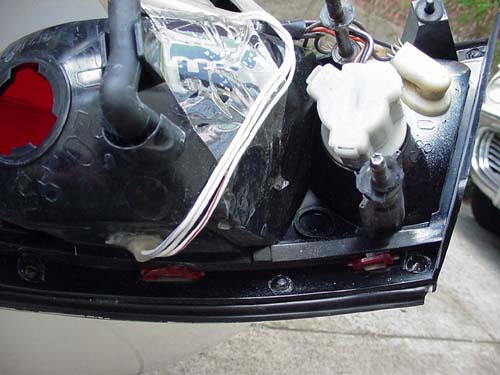
This is a view of the signal light part of the taillight assembly where I drilled a hole for the low power strobe light:
I used a generous amount of silicone glue to make the
assembly waterproof after putting in the strobe light.
|


![]()
All photos, unless noted, copyright Lincoln Motor Company. Reproduction by any means other than for personal use is strictly prohibited.
Permission to use material on this site can be obtained by contacting the webmasters.
Website Designed by Vistitude Computer Solutions, Inc